README.md
<html>
<head>
<title>Zebra Windows Printer Driver</title>
<meta http-equiv="Content-Type" content="text/html; charset=iso-8859-1">
</head>
<body>
<h1>Zebra Windows Printer Driver</h1>
<p>Build v5.5.7.19<br>
11/09/2006</p>
<h3><br>Table of Contents </h3>
<blockquote>
<p><a href="#Installation">1. Installation</a><br>
<a href="#Supported_Printers">2. Supported Printers</a><br>
<a href="#Tips">3. Tips and Advice</a><br>
<a href="#Known_Issues">4. Known Issues</a><br>
<a href="#Change_Log">5. Change Log</a><br>
<a href="#Getting_Updates">6. Getting Updates</a></p>
</blockquote>
<p><br>
Welcome!</p>
<p>This version of the Zebra Windows Printer driver offers many new features and
user conveniences. Currently shipping Zebra printers using CPCL, EPL2 or ZPL
II can now be driven using one set of driver files. A common user interface
for all of the printer languages makes it easy to work with any of the supported
printers listed below. New utilities, such as a Font Downloader, Driver-Cloning
and Driver Uninstall have been included. The number of printer native bar codes
and fonts supported by the driver has been increased. The driver now also supports
printing over USB with Zebra printers offering USB connectivity. </p>
<h2><a name="Installation"></a>1. Installation </h2>
<p>This driver is supported on:</p>
<ul>
<li>Windows 95</li>
<li>Windows 98 SE </li>
<li>Windows ME </li>
<li>Windows NT v4.0 </li>
<li>Windows 2000</li>
<li>Windows XP </li>
<li>Windows Server 2003</li>
</ul>
<p>The driver is compatible with:
<ul>
<li>Windows 2000 Terminal Services</li>
<li>Citrix Metaframe v1.8 for Windows 2000.</li></ul>
(Windows and Windows Terminal Services are registered trademarks of Microsoft
Corporation. Metaframe is a registered trademark of Citrix Systems, Inc.)
<p><strong>Important Note: </strong></p>
<blockquote>
<p>You may see this dialog box - "Digital Signature Not Found" when
installing the driver. If you do, click on the "Yes" button to continue
with the installation. This driver has not been Digitally Signed, however
it has been tested extensively for operating system compatibility.</p>
</blockquote>
<h3>How to Install Zebra Printer Drivers </h3>
<p>Drivers can be installed from the Windows "Add Printer Wizard" or
using the Installation Utility that came with the driver. NOTE: your user account must have
the necessary rights to install a driver otherwise contact your system administrator for further assistance.</p>
<p>To install using the Installation Utility:</p>
<ol>
<li>Uncompress the driver files. Be sure to note the location that the files
are placed into.</li>
<li>Run the setup.exe utility. </li>
<li>Select the language to install in. Currently, English is the only choice.</li>
<li>Follow the prompts to select the printer model and port that you will be
using. </li>
<li>The Utility will install the appropriate files and then run the Configuration
Wizard to help you configure your new driver. </li>
<li>When the Install/Configure Wizard is complete, your new driver is installed
and ready for use. </li>
</ol>
<p><br>
To install the driver using the Windows "Add Printer Wizard":</p>
<ol>
<li>Uncompress the driver files. Be sure to note the location that the files
are placed into.</li>
<li>Using the START menu select "Settings" and then "Printers".
The Printers folder will open up. </li>
<li>Double click on "Add Printer" and follow the prompts to begin
the installation process. </li>
<li>When you come to the dialog screen that lists Manufacturers and Printers,
select "Have disk".</li>
<li>Point to the location that contains the uncompressed driver files.</li>
<li>Select the zsd.inf file and click "OK" to continue. <br>NOTE: Windows NT users should select the zsdnt.inf file
located in the \WINNT directory of the drivers' installation files.</li>
<li>Select your printer model from the list of supported printers and click
the Next button to continue. There are three categories, one for CPCL printers,
one for EPL printers and one for ZPL printers. Click "Next" to continue
the installation process. </li>
<li>If your printer is connected via a RS-232 serial connection, select "No"
to the question "Would you like to print a test page?". This is
suggested to avoid an error message in case you have not configured the
port on the computer to match the serial settings on the printer. If your
printer is connected via a parallel port and is ready to print, select "Yes"
to print the test page. </li>
<li>Follow the remaining prompts to complete the Wizard. Once the install is
done your printer driver is now installed and ready for use.</li>
</ol>
<br>
<h2><a name="Supported_Printers"></a>2. Supported Printers</h2>
<p>The following Zebra printers are supported in this version:</p>
<p><strong>CPCL printers</strong>
<blockquote>
<p>Bravo 2<br>
Bravo 4<br>
Cameo 2<br>
Cameo 2 Plus<br>
Cameo 3<br>
Cameo 3N<br>
Encore 2<br>
Encore 3<br>
Encore 3N<br>
Encore 4<br>
Encore 4SE<br>
MZ220<br>
MZ320<br>
QL220<br>
QL320<br>
QL420<br>
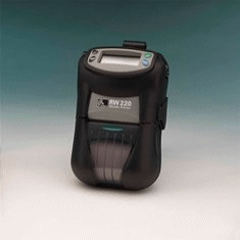
RW220<br>
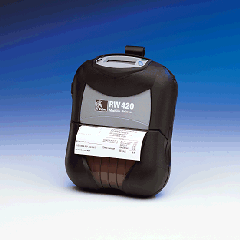
RW420
</blockquote>
<p>The driver files also make provision for the installation of a ZPL II based
"Firmware Loader" driver. The Firmware Loader driver is intended to
allow a printer to Plug and Play with the operating system using a non-model
specific USB Plug and Play string. This can allow a user to create a virtual
USB port on the operating system that can then be used in downloading printer
firmware over a USB connection. The Firmware Loader driver is not intended for
regular use. </p>
<br>
<h2><a name="Tips"></a>3. Tips and Advice</h2>
<ol>
<li><p>If you are upgrading from an earlier version of the Zebra printer driver,
the font and bar code names have changed. It will be necessary to update
your document(s) with the new names used in this version of the driver to ensure
correct printing. In some cases, using font or bar codes names from prior
driver versions can cause graphics to print incorrectly. Be sure to update documents
with new font and bar code names.</p>
</li>
<li>The ZPL II drivers in this driver are intended for use with ZPL II printers
using firmware X.10 or later. Firmware updates are available for selected
printers at http://www.zebra.com/
<p>Printers using older firmware can also be used with the driver. </p>
<p>This includes the following firmware groups:</p>
<p>X.8.X<br>
X.9.X<br>
X.10.X</p>
<p>To use the driver with Pre. X.10.X firmware printers, install the driver for a model that is similar to your printer. Once the driver is installed, go to the "Document" tab in the driver and set "Printer Firmware" to "Pre. X.10". The driver will then use pre.X.10 ZPL commands to print graphics, such as True Type fonts, line art or photographs. <br>
Please note that the driver you select may offer some bar codes and other features
that are only supported in newer printer firmware versions.</p>
<p align="left">The table below indicates which driver to install when using an older printer:</p>
<p><li>Use the Bar Code Passthrough Mode start and end sequence with 2D bar codes
such as Datamatrix, PDF-417, Micro PDF-417, QR Code. The bar code Passthrough
Mode can be activated on the Options tab of the driver. The default start sequence
is B{ and the default end sequence is }B. Thus, a line of data to be encoded
in QR Code would be entered as: B{this is the data}B</li><p></p>
<p><li>Use the Bar Code Passthrough Mode start and end sequence with bar codes
that cover more than one line in your document. The bar code Passthrough Mode
can be activated on the Options tab of the driver. The default start sequence
is B{ and the default end sequence is }B. Thus, two lines of data to be encoded
in Code 128 would be entered as: B{thisistwolinesofdata}B</li><p></p>
<p><li>Applications will not list the internal fonts unless the Zebra printer driver
is the selected driver. This can be done by setting the driver to be the default
driver before starting the application or by selecting the Zebra driver while
designing the document to be printed. </li><p></p>
<p><li>All bar codes are represented using the same display font. This means that
2-D bar codes appear as picket fence barcodes on the screen, but print as the
intended 2-D bar code. The bar code display font is not WYSIWYG. Users may
have to adjust the position of the bar code to achieve the desired placement on
the printed label. Please keep in mind that if you are printing multiple labels
with variable data, the dimensions of the bar code will change from one label
to the next. </li><p></p>
<p><li>Multiple bar codes and fonts of the same type, but with different characteristics,
can co-exist within the driver. For example, it is possible to have more than
one Code 128 bar code type defined - one with human readable on and one with
human readable turned off.<p></p>
<p>To create a new bar code type, go to the "Printer" tab in the driver
properties, click on "Bar Code Options" and then on " Settings".
The "Printer Bar Codes" dialog will display. Click on the "New"
button, enter a name for the bar code in the "Bar Code Properties"
prompt and choose the symbology type and related bar code characteristics that
you require. Click "OK" and then "OK" again to confirm
your changes. The new bar code definition will be displayed in the font list
the
next time you start your application. </p>
<p>To create a new internal font, go to the "Printer" tab in the driver
properties, click on "Printer Fonts Options" and then on "Settings".
The "Printer Text Fonts" dialog will display. Click on the "New
Internal Font" button, enter a name for the font
in the "Font Properties" prompt and choose the internal font and
related font characteristics that you require. Click " OK" and
then "OK" again to confirm your changes. The new bar code definition will be displayed in
the font list the next time you start your application.
</li><p>
<li>It is possible to use the PassThrough Mode to include additional CPCL,
EPL2 or ZPL II commands within the label format sent to the printer. For example,
this technique can be used to send ZPL II commands to RFID printers to encode
the RFID tag. The commands should be included on the actual document and enclosed
in the Pass Through Mode start and end sequences as defined on the Options
tab. The default characters are ${ to start and }$ to end the pass through. </li><p></p>
<p><li>Using the Cloning Utility requires full Administrative rights. This is
due to the need to write directly to the HKEY_LOCAL_MACHINE registry keys. </li><p></p>
<p><li>The Cloning Utility can only be used to clone drivers of the same model
number. For example, a LP2844 driver can only be cloned to another installation
of a LP2844 driver. </li><p></p>
<p><li>The Uninstall Utility may require a restart of the operating system to
complete the removal of the drivers files. This can occur when the operating
system or an application has not fully released a given driver file. </li><p></p>
<p><li>When a new set of drivers is installed in Windows NT, 2K and XP, the operating
system creates two files in the WINNT\INF directory. The two files are the
OEMx.inf and OEMx.pnf files. The operating system creates one of each file for each
new set of a manufacturers drivers. This information is then used to present
the list of manufactures and printer models in the " Add Printer" Wizard.
The value of the x changes for each new set of drivers introduced into the system,
it is possible to have OEM1.inf through OEM22.inf (or larger) Uninstalling a
driver, either by deleting the driver from the Printers folder or by using the
Uninstall Utility, does not remove these two files. If you wish to remove these
files you should be very cautious that you are removing the OEMx.inf and OEMx.pnf
files for the Zebra printer driver and not another the ones created by another
driver. The OEM.inf file created for the Zebra driver will have the same contents
as the zebra.inf file that came with your Zebra printer driver installation
files.</li><p></p>
<p><li>In certain circumstances lines of rotated text can print on top of each
other. This can be resolved by setting the driver to portrait mode and setting
the application to landscape mode while designing the label. </li><p></p>
<p><li>On the Document tab, when you select "Use Printer Settings"
from the "Document Options" portion of the tree menu, those settings
that are no longer being sent will turn red to indicate that they
are no longer active.</li><p></p>
<br></ol>
<h2><a name="Known_Issues"></a>4. Known Issues</h2>
<ol>
<li>Some multi-page documents require you to turn on the Smart Download feature
on the Document tab. If not turned on, some pages may print more than once
(in place of other pages).<br><br>
</li>
<li>The ZPL II Drivers will not print more than 32767 copies of a document.
This is a Windows limitation. <br><br>
</li>
<li>Some large documents can cause an error in Acrobat Reader on Windows 98.
<br><br>
</li>
<li>Graphics print best when a monochrome image is used. Because Zebra printers
are monochrome printers, color and grayscale images will be printed using
the dithering method you select on the Options tab. There are four available
dithering methods, each offering some control over the final printed image.
However, monochrome images will print in a more predictable fashion.<br><br>
</li>
<li>When using Word, the application forces the driver to insert spaces into
any edited line of text using the ZPL Font 0 (ZB:Zebra CG Triumvirate). If
you save the document after editing the text, but before printing it, the
spaces will not be inserted on the printed label. <br><br>
</li>
<li>Not all Applications will read internal font information from drivers. Some
applications will not present the list of native fonts and bar codes even
if the operating system is restarted after installing and the driver is set
as the default driver. This is a limitation of some applications. <br><br>
</li>
<li>There is no printer image for the Bravo 2 or Bravo 4 on the About dialog.
<br><br>
</li>
<li>Due to changes in the User Interface, the Cloning Utility cannot copy the
settings from builds v5.0.0.2 thru v5.0.0.6 onto v5.2.2.6 or later builds
of the driver. Settings from v5.2.2.6 builds can be copied onto later builds.
<br><br>
</li>
<li>When pre X.10 firmware is selected with ASCII or Binary Download Method,
and SmartDownload is On, you may see corruption in large graphic images. If
this happens set SmartDownload to Off. </li>
</ol>
<br>
<h2><a name="Change_Log"></a>5. Change Log</h2>
<p>This is build v5.5.7.19<br>
The driver engine is v1.0.0.35<br>
The language monitor is v1.0.0.43<br>
The model set is v19</p>
<table width="69%" border="1" cellspacing="0" cellpadding="5">
<tr>
<td width="13%">v5.0.0.2</td>
<td width="87%">Initial release of new platform</td>
</tr>
<tr>
<td width="13%">v5.0.0.3</td>
<td width="87%">Added USB printing components to .inf file for 2746e, <br>
TLP-2844Z, LP-2844Z, TLP-2824 AND LP2824</td>
</tr>
<tr>
<td width="13%">v5.0.0.4</td>
<td width="87%">Thermal Transfer Mode added to PT403, <br>
Updated EPL drivers to include support for EAN-13, EAN-13 addon 2, EAN-13
addon 5 </td>
</tr>
<tr>
<td width="13%">v5.0.0.5</td>
<td width="87%">Added 110XiIII Plus 200dpi, 300dpi, 600dpi units</td>
</tr>
<tr>
<td width="13%">v5.0.0.6</td>
<td width="87%">Added TLP3842<br>
Added TLP3844-Z<br>
Added ZMetal 420,430,620 and 630<br>
Added cutter support for T402, LP2844Z and TLP2844Z<br>
Corrected the displayed print speeds for 2824 & 2844 units</td>
</tr>
<tr>
<td width="13%">v5.0.0.7</td>
<td width="87%">ZMetal now Z Plus</td>
</tr>
<tr>
<td width="13%">v5.2.2.6</td>
<td width="87%">Added support for x.8.x and x.9.x ZPL graphic printing commands.<br>
Added Configuration branch to Document Options tree <br>
(allows user to control if printer configuration commands are sent).<br>
Added Enable Line/Box Substitution checkbox to Option tab <br>
(allows user to control if printer commands are used to draw lines or boxes).<br>
Moved printer control options from Printer tab to Document tab<br>
(allows user to control commands from within documents).</td>
</tr>
<tr>
<td width="13%">v5.2.3.7</td>
<td width="87%">Enabled multiple instances</td>
</tr>
<tr>
<td width="13%">v5.2.3.8</td>
<td width="87%">Added support for the R2844-Z<br>
Updated the help file system</td>
</tr>
<tr>
<td width="13%">v5.2.3.9</td>
<td width="87%">Added 170XiIII Plus (200dpi), 220XiIII Plus (300dpi)</td>
</tr>
<tr>
<td width="13%">v5.2.3.10</td>
<td width="87%">Updated label size selections</td>
</tr>
<tr>
<td width="13%">v5.2.3.11</td>
<td width="87%">Added 110PAX4 LH/RH (200 & 300 dpi), R110XiIII Plus, QL220<br>
Default media type set to Thermal Transfer for TLP2844Z & TLP3844Z<br>
Max label width for LP2824 and TLP2824 set to 2.4" from 2.2"</td>
</tr>
<tr>
<td width="13%">v5.3.4.12</td>
<td width="87%">Added a "User Mode Driver" for Windows 2000, Windows XP and Windows 2003 Server <br>
Retained "Kernel Mode Driver" for use in Windows NT <br>
Retained current drivers for use in Windows 9x as indicated above <br>
Added 170PAX4 LH/RH (200 & 300 dpi)</td>
</tr>
<tr>
<td width="13%">v5.3.4.13</td>
<td width="87%">Added LP2824-Z, TLP2824-Z, R4M Plus (200 dpi)</td>
</tr>
<tr>
<td width="13%">v5.3.5.14</td>
<td width="87%">Added new memory management features to language monitors<br>
Added RW420</td>
</tr>
<tr>
<td width="13%">v5.3.5.15</td>
<td width="87%">Added R110Xi (200 & 300 dpi), R170Xi (200 & 300 dpi)</td>
</tr>
<tr>
<td width="13%">v5.4.6.16</td>
<td width="87%">Bug fixes: User Commands in Document tab are now functional; Improved uninstall utility; Font Downloader now downloads styles.<br>
Added R110PAX4 LH/RH(200 & 300 dpi), 888-DT, 888-TT, S4M-200dpi(ZPL & EPL), S4M-300dpi(ZPL & EPL).<br>
Printer lists now alphabetized.</td>
</tr>
<tr>
<td width="13%">v5.5.7.17</td>
<td width="87%">Bug fixes: Can now print multiple copies in Word, Corrected ZPL(~JSO) for No Backfeed option, changed LP2824Z max paper width from 2 inches to 2.4 inches. <br> Added RW 220.<br>
</td>
</tr>
<tr>
<td width="13%">v5.5.7.18</td>
<td width="87%">Added MZ 220.<br>Added peel option to 110XiIII Plus 200, 300 and 600 dpi.
</td>
</tr>
<tr>
<td width="13%">v5.5.7.19</td>
<td width="87%">Added MZ 320.
</td>
</tr>
</table>
<p><br>
</p>
<h2><a name="Getting_Updates"></a>6. Getting Updates</h2>
<p>Zebra Printer Drivers are frequently updated and modified to take advantage
of new developments. Updated drivers will be available on our web site: <a href="http://www.zebra.com">http://www.zebra.com/</a></p>
<p><br>
Zebra Technologies Corporation<br>
(C) 2006 ZIH Corp. All rights reserved.<br>
</p>